Mastering the Basics: A Step-by-Step Guide to Your First ComfyUI Text-to-Image Workflow
Welcome to the world of ComfyUI! If you're ready to move beyond basic interfaces and get hands-on with the mechanics of AI image generation, you've come to the right place. This tutorial will guide you through creating the most fundamental text-to-image workflow. By building this yourself, you'll gain an essential understanding of the data flow that powers nearly every generative AI art technique.
Objective:
To build a workflow that takes a text prompt and generates an image, demystifying the core components of the diffusion process.
Prerequisites:
- ComfyUI installed and running on your local machine or a cloud instance.
- A Stable Diffusion checkpoint file (e.g., SDXL Base, JuggernautXL, etc.) downloaded and placed in your
ComfyUI/models/checkpointsfolder.
Understanding the Core Concept: From Prompt to Pixels
At its heart, generating an image from text is a structured process. We need to load a model, tell it what to create, give it a canvas to work on, let it run its creative process, and finally, translate its work into a viewable format. In ComfyUI, each of these steps is a "node." Let's build the workflow that created this image from the prompt: "A flying dog wearing superman suit and flying through clouds."
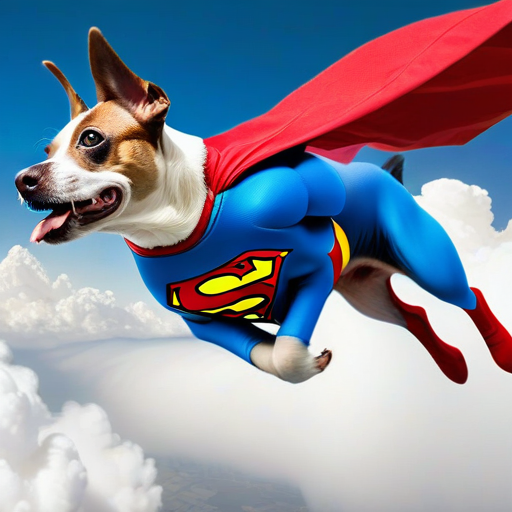
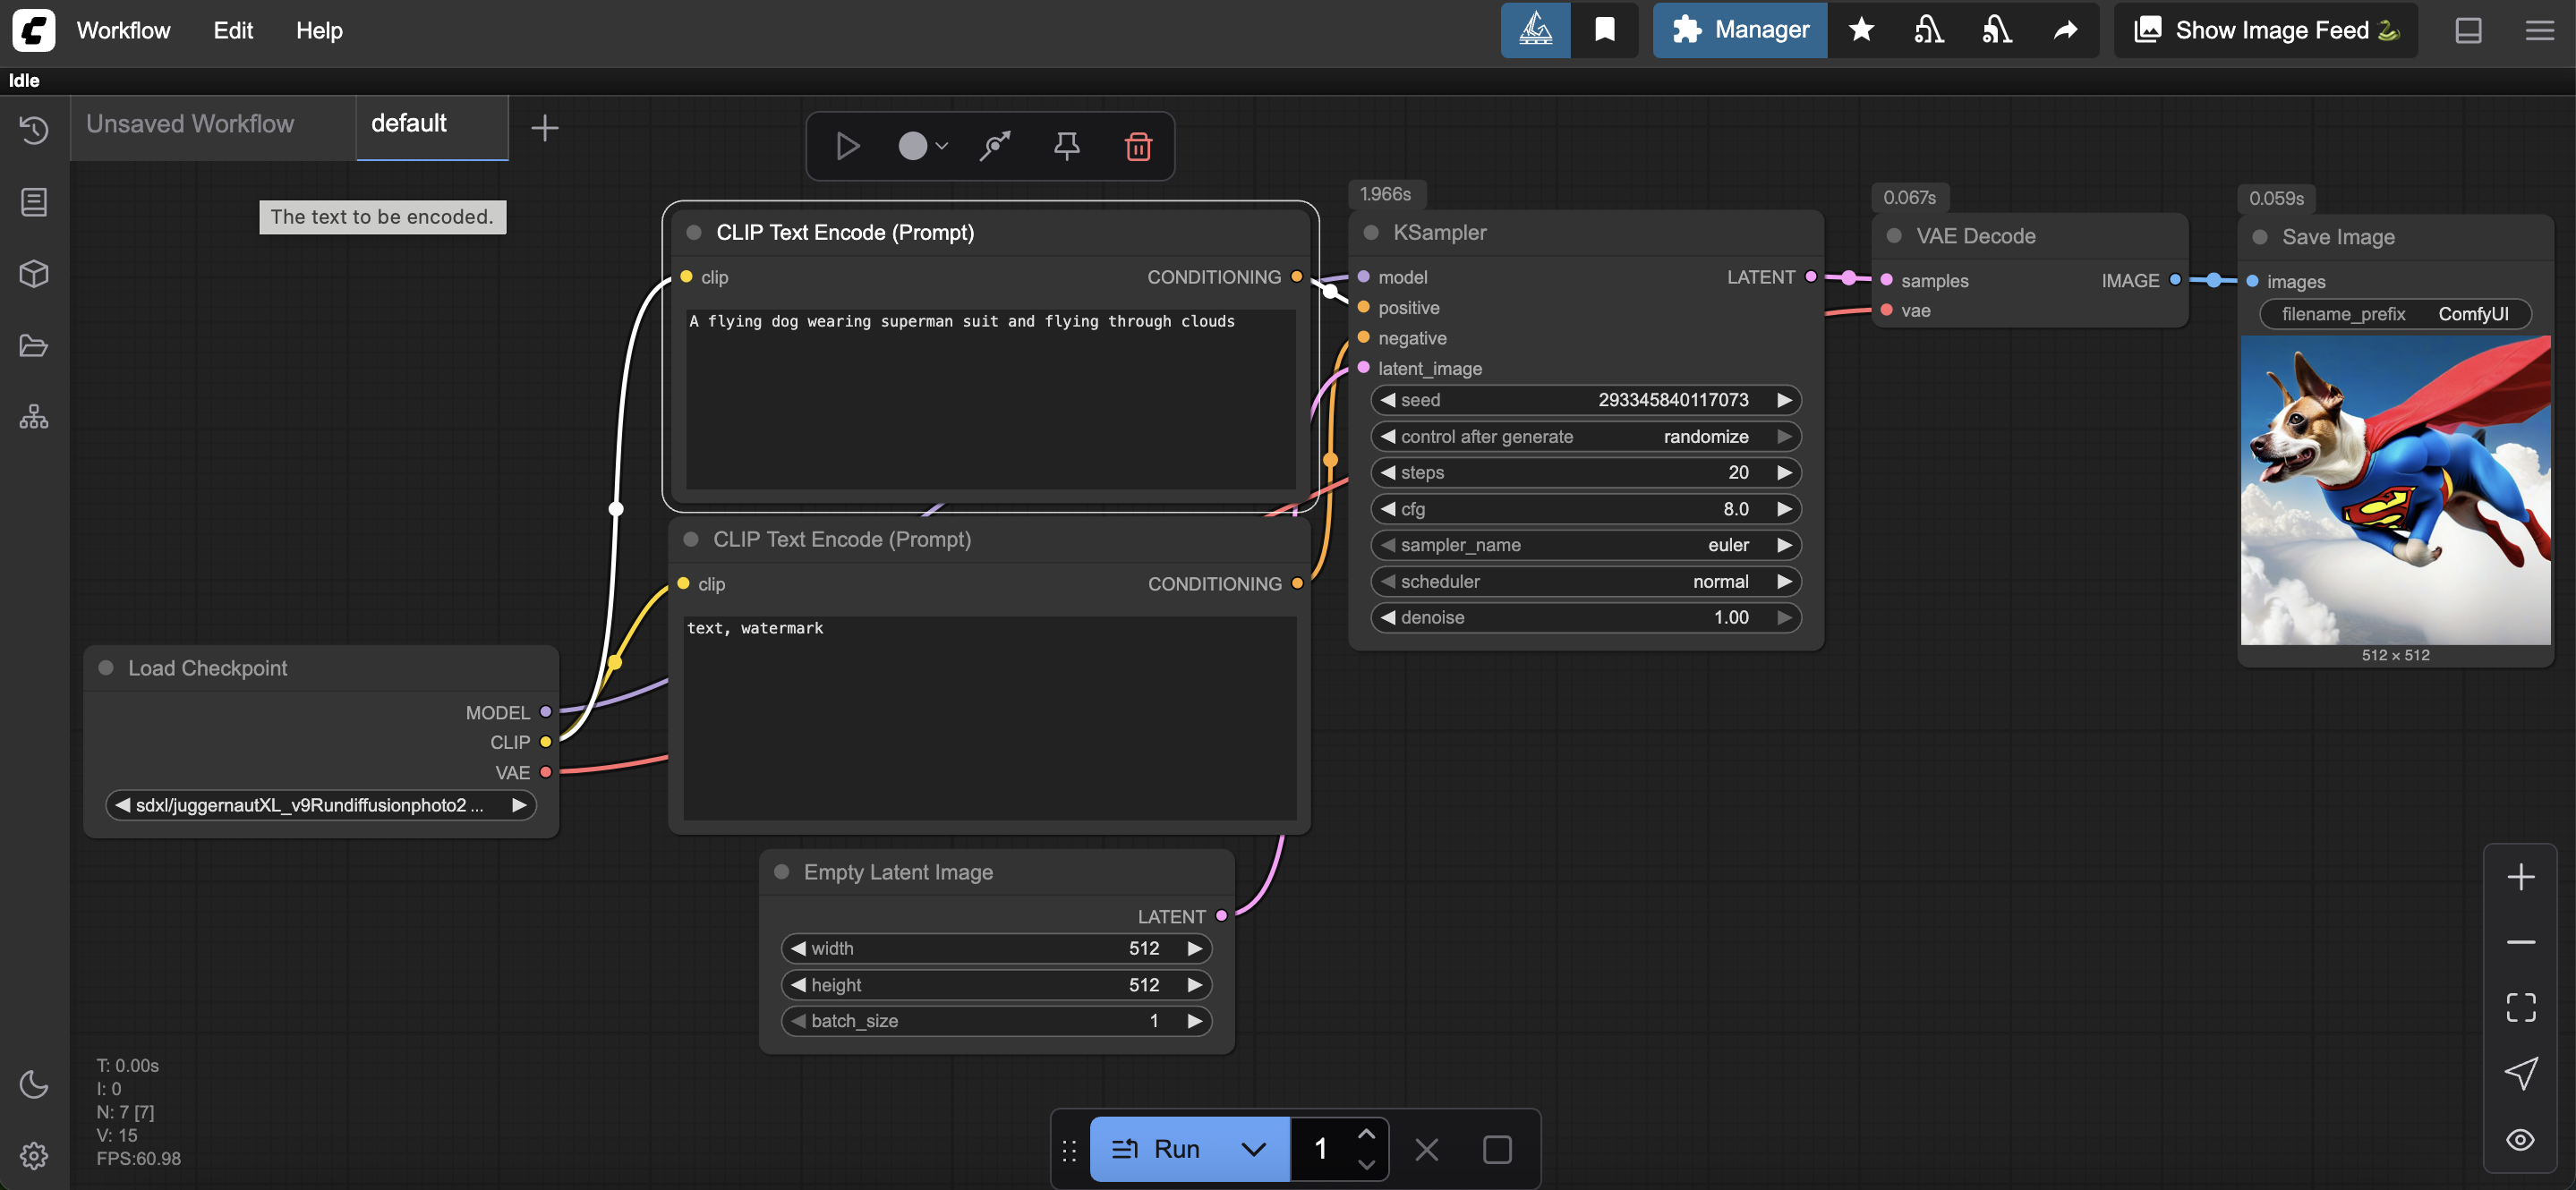
And here is the workflow that created it:
Step 1: Loading the AI Model (The Brain)
Every creation needs a creator. In our case, this is a Stable Diffusion model, or "checkpoint."
- Add the Node: Double-click on the empty graph space in ComfyUI. A search menu will appear. Type
Load Checkpointand select it. - Select Your Model: In the newly created
Load Checkpointnode, click the dropdown menu and select the checkpoint file you downloaded.
Educational Insight:
This single node provides three crucial outputs:
MODEL: The main neural network that performs the denoising (image generation).CLIP: The text encoder model that interprets your written prompts.VAE: The Variational Autoencoder, which translates between the compressed "latent space" the AI works in and the final "pixel space" we see.
Step 2: Writing the Instructions (The Prompts)
Now we need to tell the model what we want it to create and what to avoid.
- Add Prompt Nodes: Double-click the canvas and create two
CLIP Text Encode (Prompt)nodes. It's good practice to label them. Click on the node's title to rename one to "Positive Prompt" and the other to "Negative Prompt." - Connect the CLIP: Drag a "noodle" (the connecting wire) from the
CLIPoutput of yourLoad Checkpointnode to theclipinput on both of yourCLIP Text Encodenodes. - Enter Your Text: In the "Positive Prompt" node, type what you want to see (e.g.,
A flying dog wearing superman suit and flying through clouds, high quality, detailed). In the "Negative Prompt" node, type what you want to avoid (e.g.,text, watermark, blurry, deformed).
Educational Insight:
You're converting human language into CONDITIONING, a mathematical representation (embedding) that the main model can use as a guide during the generation process. Separating positive and negative conditioning gives you powerful control over the output.
Step 3: Preparing the Canvas (The Latent Space)
The AI doesn't draw on a blank white image. It starts with a field of structured noise in a compressed data format called the latent space.
- Add the Node: Create an
Empty Latent Imagenode. - Set Dimensions: For this example, set the
widthandheightto512. You can also adjust thebatch_sizeif you want to generate multiple images at once.
Educational Insight:
This step is crucial. The initial state of this latent noise, determined by the seed, is what ensures every generation is unique (unless the seed is kept the same). The dimensions here directly control the final output resolution.
Step 4: The Generation Process (The KSampler)
This is where the magic happens. The KSampler node takes the model, the instructions, and the canvas, and orchestrates the entire diffusion process.
- Add the Node: Create a
KSamplernode. This node has several inputs we need to connect. - Connect the Inputs:
- Drag the
MODELoutput fromLoad Checkpointto themodelinput on theKSampler. - Drag the
CONDITIONINGoutput from your "Positive Prompt" node to thepositiveinput on theKSampler. - Drag the
CONDITIONINGoutput from your "Negative Prompt" node to thenegativeinput on theKSampler. - Drag the
LATENToutput fromEmpty Latent Imageto thelatent_imageinput on theKSampler.
- Drag the
- Adjust Settings:
seed: Can be randomized to produce different images.steps: Number of denoising steps.20is a good start. More steps can add detail but take longer.cfg: How strictly the AI should follow your prompt.8.0is a balanced value.sampler_name: The algorithm used for denoising.euleris a fast and common choice.
Step 5: Decoding and Saving the Final Image
The KSampler outputs a finished image, but it's still in the latent space. We need the VAE to translate it back to a normal image.
- Add Decode Node: Create a
VAE Decodenode. - Connect the VAE: Drag the
VAEoutput from your originalLoad Checkpointnode to thevaeinput on theVAE Decodenode. - Connect the Latent Image: Drag the
LATENToutput from theKSamplerto thesamplesinput on theVAE Decodenode. - Add Save Node: Create a
Save Imagenode. - Connect the Final Image: Drag the
IMAGEoutput fromVAE Decodeto theimagesinput on theSave Imagenode.
Conclusion: Your First Workflow is Complete!
Your graph should now look like the reference image. Press the "Queue Prompt" button and watch it run! You've successfully built the foundational text-to-image pipeline.
Further Educational Experiments:
- Vary the
stepsandcfg: See how lower or higher values affect the output's adherence to the prompt. - Change the
sampler_name: Experiment with other samplers likedpmpp_2m_sdeand observe the differences. - Refine your prompts: Add more descriptive words or stronger negative prompts to guide the AI.
You now understand the logical flow of data in a diffusion model. This knowledge is the bedrock upon which you'll build more complex and powerful workflows. Happy generating!